
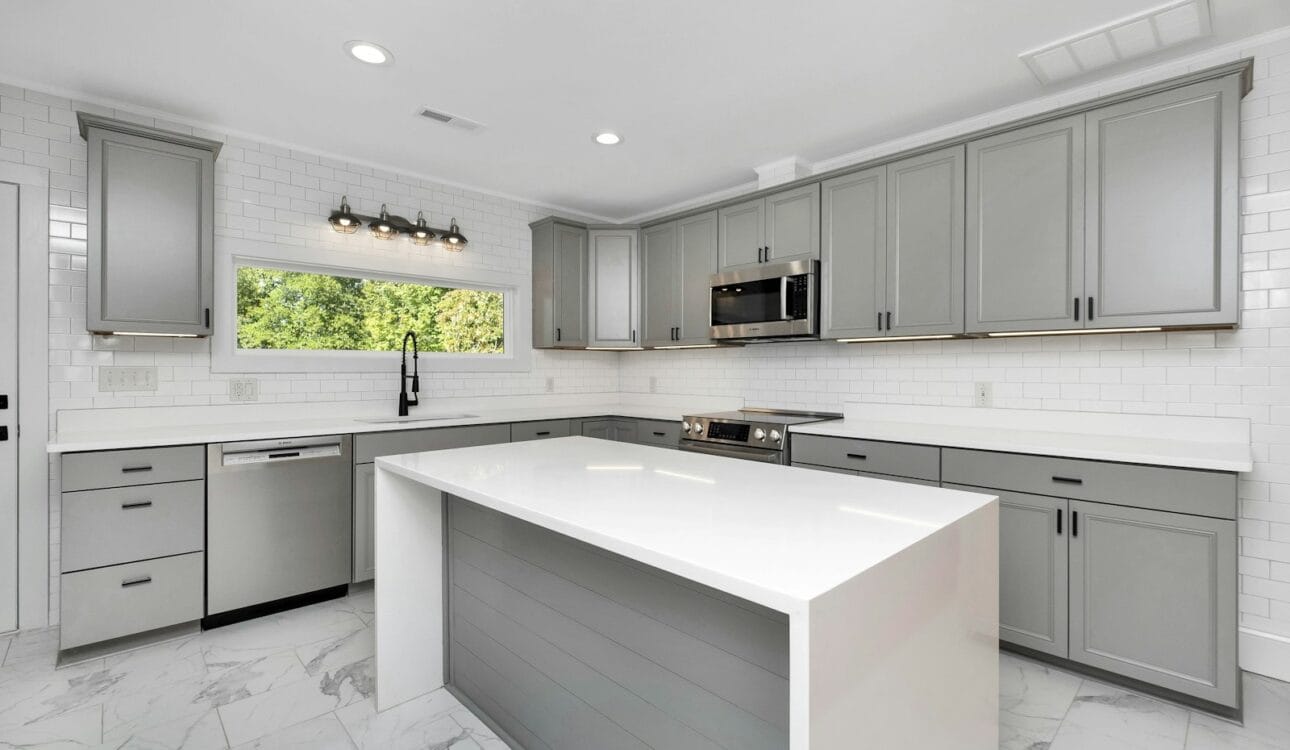
The day your new kitchen is handed over is exciting. After weeks of decisions, measurements, manufacturing and installation, the space is finally ready. It is tempting to glance around, admire the fronts, thank the installers and start using it straight away. But handover is also the best moment to check the kitchen carefully, while the installation team is still present and small adjustments take minutes rather than a separate visit.
This guide gives you a practical, room-by-room checklist for inspecting a new kitchen. It explains what to look for in cabinets, doors and drawers, the worktop, the sink and plumbing, appliances, lighting and finishing details, what counts as normal and what should be corrected, and how to document anything that needs follow-up. It comes from a Riyadh kitchen factory that has handed over more than 5,000 kitchens since 2015, and it reflects what we check ourselves before we consider a kitchen finished.
Prepare for the handover
A good inspection takes time, so plan for it. Ask the installer when the kitchen will be completely finished, including the worktop, appliances and final adjustments, and arrange the handover for then rather than while work is still in progress. Make sure the lighting is working, because many details are hard to judge in poor light. Have the approved design, the quotation and any change notes to hand, so you can compare what was installed with what was agreed. A phone for photos and a notepad or a notes app will help you record observations clearly.
If possible, the person who cooks most in the house should take part, because they will notice things that matter in daily use. Allow at least an hour for an average kitchen, and more for large kitchens with islands and many appliances.
Step 1: Compare the kitchen with the approved design
Begin with the big picture. Walk around the kitchen with the design drawings and check that each cabinet is where it should be and of the agreed size. Confirm that the sink, cooktop, oven, refrigerator, dishwasher and any other appliances are in their planned positions. Check that the materials, colours and handles match what you approved; sometimes a sample viewed in a showroom looks slightly different in your own lighting, which is normal, but the material and colour code should be the ones agreed. Note any differences, whether they are problems or simply changes made during installation that you were told about.
Step 2: Inspect every door
Open and close every door in the kitchen, one by one. Each should open smoothly to its full angle without catching on neighbouring doors, handles, walls or appliances, and close gently if soft-close hinges were specified. Look at the gaps between doors: they should be narrow, even and consistent. Check that door tops and bottoms align along each run and that the fronts sit flat in the same plane.
Small misalignments right after installation are normal and are usually corrected by adjusting the hinges, which on quality concealed hinges can be done in three directions. Ask the installer to correct anything that is visibly off before they leave. If a door cannot be aligned, looks warped, or rubs against its neighbour no matter how it is adjusted, note it for follow-up.
Step 3: Inspect every drawer
Open each drawer fully and let it close. It should run smoothly and quietly, extend as specified — full extension where agreed — and close gently without bouncing. Press lightly on the front of an open deep drawer: it should feel solid, not loose. Check that drawer fronts align with each other and with nearby doors, and that gaps are consistent. Look inside for any damage to the drawer box and check that internal organisers, if included, fit properly.
If you have heavy-duty drawers for pots or a pull-out pantry, open them with some weight inside if possible. They should still move smoothly. Push-to-open drawers should open with a light press and not open accidentally when bumped.
Step 4: Check wall cabinets and lift systems
Wall cabinets should be level along each run, firmly fixed, and aligned with each other and with tall units. Lift-up flaps should stay open at every position and close under control. Check that shelves are level, supported properly, and adjustable if specified. Glass doors and shelves should be clean, undamaged and properly fitted.
Step 5: Check tall units and appliance housings
Tall units should be plumb, aligned with wall cabinets at the top, and firmly fixed. Integrated appliance doors — refrigerator, freezer, dishwasher — should be aligned with neighbouring fronts and open smoothly. The gaps around built-in ovens and microwaves should be even. Pull-out pantries should run smoothly and not tilt.
Step 6: Inspect the worktop
The worktop deserves careful attention, because it is difficult to change later.
- Surface: look along the worktop at a low angle against the light. Check for chips, scratches, stains or cloudy patches.
- Edges: run your hand along the edges. They should be smooth and consistent, without chips, especially at corners.
- Joints: joints should be tight, level with no step between the pieces, colour-matched as closely as the material allows, and neatly sealed.
- Level: place a small level or a round object on the worktop to see whether it rolls noticeably.
- Cut-outs: the sink and cooktop openings should be neatly finished; around undermount sinks, the polished edge should be smooth and the sealant continuous.
- Backsplash and upstands: the joint between the worktop and the wall or backsplash should be neatly sealed with no gaps.
- Overhangs: seating overhangs on islands should feel solid when you lean on them.
If the worktop was templated after the cabinets were installed and fitted later, make sure it has been completed before you sign off the whole kitchen, or note clearly that the worktop is pending. Our worktop guide explains what is normal for each material.
Step 7: Test the sink and plumbing
Run both hot and cold water for a few minutes. Check that the tap works smoothly and does not drip when closed. Fill the sink partly and let it drain: the water should drain quickly without gurgling. With water running, open the sink cabinet and look carefully at every connection — supplies, isolation valves, waste pipes and the dishwasher hose — for drips. Use a dry tissue around joints if needed; it will show even a small leak. Confirm that the isolation valves are reachable and that you know how to close them. If a water filter or instant hot water tap was installed, test them too.
Step 8: Test the appliances
Switch on each appliance briefly: cooktop zones or burners, oven, microwave, hood at every speed and its lights, refrigerator, and dishwasher. For gas cooktops, confirm that the installer tested the connection and that the shut-off valve is accessible. Check that appliance doors open fully without hitting cabinets or handles, and that the hood is at the height recommended by its manufacturer. Keep appliance manuals and warranty cards together; the appliance warranties are usually provided by their manufacturers.
Step 9: Check lighting and electrics
Switch on every light: ceiling lights, under-cabinet lights, pendants, and any lights inside cabinets or drawers. They should work from the correct switches, match in colour temperature, and show no flickering. Check that worktop sockets are at the planned positions and work, and that power for built-in appliances is where it should be. Ask where LED drivers are located so they can be reached later.
Step 10: Look at finishing details
The details are what make a kitchen look precise:
- Visible cabinet sides should be finished to match the fronts.
- Filler panels against walls should be neatly scribed with minimal gaps.
- The plinth should be fitted straight and firmly, with neat corners.
- Gaps between the top of the cabinets and the ceiling, or bulkheads, should be neat.
- Silicone joints should be even and clean.
- Handles should be straight, secure and aligned.
- Fronts should be free of scratches, dents and fingerprints from installation; ask for them to be cleaned.
Step 11: Check cleanliness and removal of waste
A professional installation team should leave the kitchen clean, with packaging and offcuts removed, protective films taken off (or explained if they should stay until you move in), and the inside of cabinets free of dust and debris. Screws and small parts should not be left inside drawers.
Step 12: Receive the documents
Before the team leaves, make sure you have the written warranty, care instructions for your fronts and worktop, appliance manuals and warranty cards, and ideally the final design and services layout. Ask who to contact for any follow-up and how issues are recorded and scheduled.
What is normal after installation
Some things are normal in the first weeks and months and do not indicate a defect. Doors may move slightly as the kitchen settles and need a small hinge adjustment. Silicone may need time to cure fully. New materials may have a slight smell that fades. Soft-close dampers may feel a little different after the first days of use. The key is to note anything you are unsure about and ask; a good kitchen maker will explain what is normal and correct what is not.
How to document issues
If you find something that needs correction, document it clearly: take a photo, note the location — for example, “wall cabinet above the sink, left door” — and describe the issue briefly. A short list shared in writing avoids misunderstandings and makes it easy for the team to plan the follow-up. Distinguish between items to be corrected immediately and items that can be handled in a later visit, and agree on a date.
Material-specific checks
Each material has its own points to check at handover:
- Acrylic: inspect the gloss under light for scratches; protective films should be removed carefully; learn the recommended cleaning cloth and products.
- Glass: check for chips at edges and corners and that glass fronts are securely held in their frames or hinges.
- Wood: check that finishes are even, that grain and colour are consistent across doors, and ask about care and humidity.
- Aluminium and saj: check that profiles and panels are straight and that coatings are even without scratches.
- Formica and acrylic with formica: check that edge banding is firmly bonded and neatly trimmed, especially near the sink.
After the handover: the first months
Use the kitchen normally and pay attention in the first weeks. Look under the sink occasionally for drips, notice whether any door starts to sag, and see how the finishes respond to your cleaning routine. After a few months, it is sensible to check door alignment again, since cabinets settle and hinges may need a small adjustment. Follow the care instructions from the first day, because many finish problems begin with the wrong cleaning products. Our upcoming guide to kitchen maintenance by material covers daily care in more detail.
Handover in a new home versus a renovation
The checklist is the same in both cases, but the context differs. In a new home, the kitchen is often handed over while other trades are still working in the house: painters, flooring installers, air-conditioning technicians. Their work can damage a finished kitchen if it is not protected. Ask for fronts and worktops to be covered until the other trades have finished, and inspect the kitchen again just before you move in, because a scratch caused by another trade after handover is easy to confuse with an installation defect. In a renovation, the family is usually waiting to use the kitchen as soon as possible, which creates pressure to accept it quickly. A calm inspection at handover still pays off, and most adjustments can be made on the spot while you watch.
Appliances supplied by you versus by the kitchen maker
It is common for clients to buy some appliances themselves and have the kitchen maker install them, or for the kitchen maker to supply them. The responsibility at handover differs. If you supplied an appliance, the kitchen maker is responsible for fitting it into the cabinet correctly and connecting it as agreed, while the appliance’s own performance is covered by its manufacturer’s warranty. If the kitchen maker supplied it, clarify who handles warranty claims. In both cases, test each appliance at handover, and keep the purchase documents and manuals together so that any future claim is simple.
Understanding the warranty
A written warranty is only useful if you understand what it covers. Read it at handover and ask about anything unclear. Typically, a kitchen warranty covers defects in materials and workmanship of the cabinets and their installation over a defined period, and it explains what is excluded — for example damage from misuse, water leaks from plumbing that was not part of the kitchen contract, or wear from cleaning products that the care instructions advise against. Hardware such as hinges and runners may have their own manufacturer warranties. Worktops supplied by specialists may carry separate terms. Knowing these differences from the start makes it easier to get quick help if anything happens later.
Keeping the kitchen looking new after handover
The first weeks set habits. Wipe spills promptly, especially near edges and joints. Use soft cloths and mild cleaners suited to your fronts. Avoid hanging wet towels over door edges. Use trivets for hot pots on the worktop. Run the hood whenever you cook. Open the dishwasher only after the steam has settled, so the underside of the worktop is not exposed to a blast of hot vapour every day. These simple habits protect the kitchen far more than any product.
A calm approach to handover
Handover is not an exam that the kitchen must pass or fail; it is the last step of a shared project. Most kitchens have a few small points to adjust, and a good kitchen maker expects that and welcomes your observations. Approaching the inspection calmly, with the design in hand and a clear list, helps both sides finish the project well. The goal is simple: to make sure that the kitchen you use every day is complete, safe and exactly what you agreed.
Take your time, ask questions freely, and keep your notes; they will be useful long after the installers have left.
Common handover mistakes
- Signing off the kitchen before the worktop and appliances are finished.
- Inspecting in poor light.
- Not running water and checking under the sink for drips.
- Not testing every drawer and door.
- Not asking where valves and LED drivers are.
- Not receiving written warranty and care instructions.
- Reporting issues verbally without a written record.
How we hand over kitchens at Modern Palace
Before handing over, our installation team checks the kitchen against the approved 3D design, adjusts every door and drawer, tests the sink and connections, and cleans the kitchen. We then walk through it with you, explain the care of your materials, show you where valves and drivers are located, and record any remaining points so they are completed. The kitchen, manufactured in our Riyadh factory, is covered by our written 10-year warranty. To understand the full process from order to installation, read about our kitchen fabrication stages.
Printable handover checklist
- Layout, sizes, materials and colours match the approved design.
- All doors open fully, close softly and are aligned with even gaps.
- All drawers run smoothly, extend as specified and close softly.
- Wall cabinets and tall units are level, aligned and secure.
- Lift systems stay open at all positions.
- Worktop is free of chips; joints are tight and sealed; cut-outs are neat.
- Sink drains well; no leaks at any connection; valves accessible.
- All appliances work; doors open without hitting cabinets.
- All lights and sockets work; drivers accessible.
- Finished sides, fillers, plinths and silicone joints are neat.
- Kitchen is clean; packaging removed.
- Warranty, care instructions and manuals received.
- Any remaining points recorded in writing with a date.
A careful handover turns a newly installed kitchen into a finished one. It takes an hour of attention, and it ensures that the kitchen you use every day is exactly the kitchen you approved.
Frequently asked questions
What should I check first when my new kitchen is handed over?
Start with the layout against the approved design: every cabinet in the right place and size, appliances in their planned positions, and the sink and cooktop where expected. Then check every door and drawer, the worktop and its joints, the sink and taps for leaks, and each appliance.
What gaps between cabinet doors are acceptable?
Gaps should be narrow, even and consistent across the kitchen. Small misalignments are normal immediately after installation and can usually be corrected by adjusting the hinges. Uneven gaps that cannot be adjusted may indicate a problem with the cabinet or door and should be noted.
What if I find a problem after signing the handover?
Note it in writing with photos as soon as you notice it and contact the kitchen maker. Issues covered by the warranty should be handled according to its terms. Some adjustments, such as door alignment, are normal in the first months and are simple to correct.
Should the worktop have visible joints?
Long runs and L-shapes often need joints. A well-made joint is tight, level, colour-matched and sealed, and it should not be placed over a dishwasher or directly next to a sink or cooktop cut-out unless unavoidable.
What documents should I receive at handover?
The written warranty, care instructions for your fronts and worktop, appliance manuals and warranty cards, and ideally the final design and services layout. Keep them together with your home documents.
Does Modern Palace do a handover inspection?
Yes. Our installation team goes through the kitchen with you at handover, adjusts doors and drawers, explains care for your materials, and records any remaining points so they are completed. The kitchen is covered by our written 10-year warranty.
Want a kitchen that is checked before it is handed over?
Our own teams install, adjust and inspect every kitchen, walk you through care and warranty, and record any remaining points in writing. 3D design before manufacturing. Riyadh, Al-Ahsa, Buraidah and Hail.