
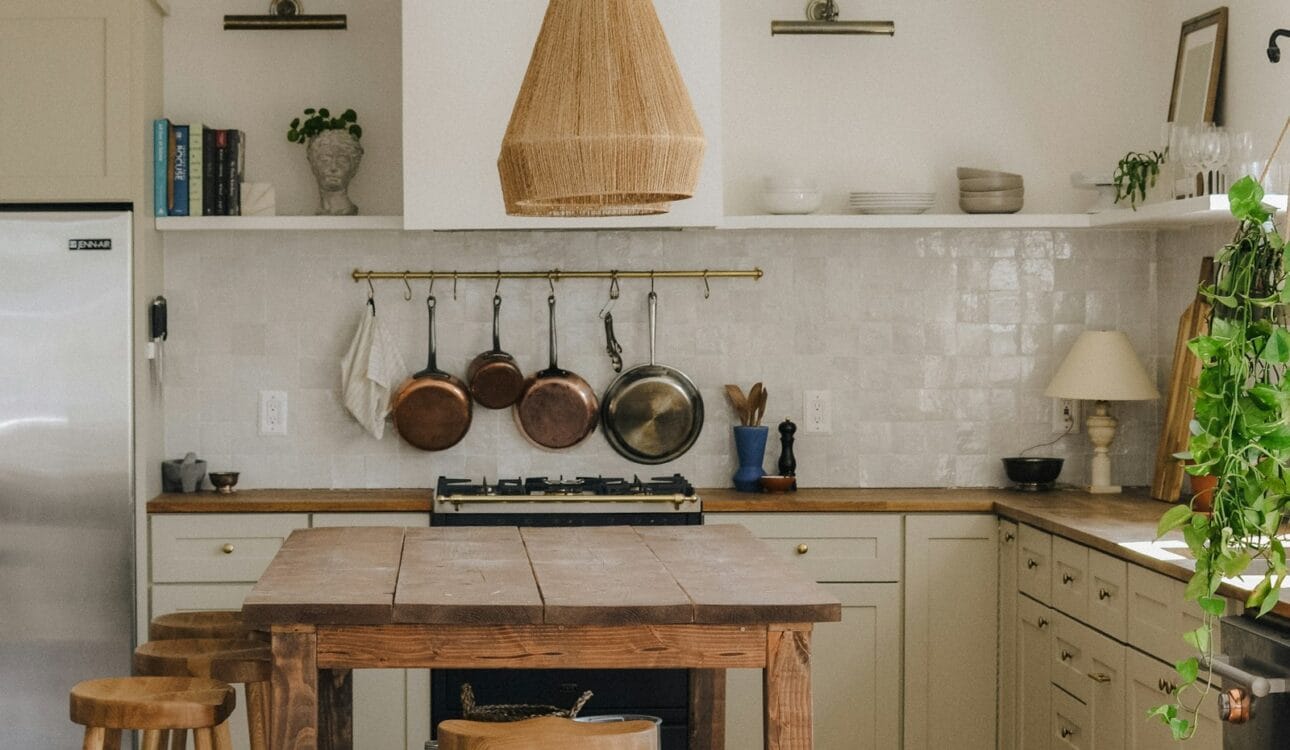
The kitchen island is probably the most requested feature in the kitchens we design in Riyadh today. Clients bring photos from Pinterest and Instagram, point at a long block of cabinets standing in the middle of the room, and say: “This is what I want.” Very often it is the right choice. Sometimes it is not — and the difference only becomes obvious after the kitchen is installed, when a door cannot open fully, a refrigerator blocks the walkway, or the family discovers that nobody actually sits at the island because the stools are uncomfortable.
This guide is written from the factory floor, not from a catalogue. Since 2015 we have designed, manufactured and installed more than 5,000 kitchens across Riyadh, Al-Ahsa, Buraidah and Hail, and islands have taught us more about planning than any other element. Below you will find the measurements that matter, the decisions you must make before tiling, the materials that behave well in Saudi homes, and a clear way to decide whether your kitchen should have an island, a peninsula, or neither.
What exactly is a kitchen island?
An island is a freestanding block of base cabinets with a worktop, placed away from the walls so that you can walk around it on all sides. That last point is what defines it. A block attached to a wall or to the end of a cabinet run is not an island; it is a peninsula. The distinction matters because an island needs circulation space on every side, while a peninsula only needs it on three.
An island can do one job or several. It can be a pure preparation surface, a serving counter, a breakfast bar, a storage unit, a place for the sink or dishwasher, a place for the cooktop, or simply a social anchor that lets whoever is cooking face the family instead of the wall. The mistake we see most often is trying to make one island do everything in a room that is only big enough for one or two of those roles.
Is your kitchen big enough for an island?
This is the first question, and it should be answered with a tape measure rather than with enthusiasm. The island itself needs a minimum useful size, and it needs clear space around it. When either of these is compromised, the island becomes an obstacle.
Minimum island size
An island shallower than about 60 cm is really just a narrow counter. For it to hold base cabinets on one side, a practical minimum depth is about 90 cm; if you want cabinets on one side and seating overhang on the other, 100 to 120 cm is more comfortable. In length, anything shorter than about 120 cm rarely justifies the space it takes. Islands of 180 to 240 cm are the most common in the villas and larger apartments we work in.
Clearance around the island
The walkway between the island and the opposite cabinets is the measurement that makes or breaks the kitchen. We plan for about 100 cm as a minimum where only one person works, and 110 to 120 cm where two people cook at the same time or where appliance doors open into the walkway. Remember that a dishwasher door, an oven door and a deep drawer all project around 50 to 60 cm when open. If the walkway is only 90 cm, an open dishwasher blocks it completely.
Put together, these figures mean that a kitchen usually needs an internal width of roughly 3.8 to 4 metres before a real island fits comfortably between two runs of cabinets. In a narrower room, an island will technically fit on paper but will feel crowded in daily use.
When a peninsula is the better answer
If your kitchen is between about 3 and 3.8 metres wide, a peninsula often gives you almost everything an island promises — extra worktop, seating, a place to face the room — while needing circulation space on fewer sides. It is also easier to feed with water and electricity, because services can travel along the wall rather than under the floor. We cover the broader comparison of layouts in our guide to the kitchen types we build.
Decide the island’s job before you draw it
Every island decision flows from its main purpose. Before discussing colours or handles, we ask clients to rank what they want the island to do. The answer changes the depth, the services, the materials and the budget.
The preparation island
This is the simplest and often the most useful version: a long, uninterrupted worktop with deep drawers underneath for utensils, pots and small appliances. It needs power sockets for mixers and kettles, ideally on the ends or discreetly set into the side panels, and good task lighting above. Because there is no sink or cooktop, it can be placed exactly where it is most convenient, without worrying about drainage or ventilation.
The sink island
Putting the sink in the island lets you face the room while washing up, and it keeps the wall run free for tall cabinets and appliances. But it requires a water supply and a drain routed through the floor to the island’s position. That work must be done before the floor is tiled, which means the island position has to be fixed early in a renovation or new build. The drain also needs a proper fall; if the island is far from the main stack, this becomes harder. A dishwasher is almost always placed next to an island sink, which again affects the walkway clearance.
The cooking island
A cooktop on the island is dramatic and sociable, but it is the most demanding option. You need a ceiling-mounted hood or a downdraft extractor, a ducting route to the outside, and a dedicated electrical line or gas supply. You also need a safe zone: we recommend at least 30 to 40 cm of worktop on each side of the cooktop and a raised or deeper section behind it if people will sit on the far side, so that splashes and heat do not reach them. In Saudi homes where heavy daily cooking is common, many families choose to keep the main cooktop against the wall and treat the island as a clean, social zone.
The social and seating island
If the island’s main role is breakfast, homework, coffee or hosting, then comfort matters more than storage. That means a proper overhang, the right height for the chosen stools, and enough length per person. We explain those numbers in detail below, because seating is the part most often underestimated.
Seating at the island: the numbers that make it comfortable
Stools that nobody uses are one of the most common regrets. The cause is almost always one of three things: too little knee space, the wrong height, or not enough width per person.
- Width per person: allow at least 60 cm of worktop length for each seat. Four people need roughly 240 cm.
- Overhang: the worktop should project about 25 to 30 cm beyond the cabinet face on the seating side so that knees fit comfortably underneath. Larger overhangs need hidden brackets or a thicker worktop to stay stable.
- Counter height seating: with a standard worktop of about 90 cm, choose stools with a seat height of roughly 63 to 66 cm.
- Bar height seating: a raised section of about 105 cm pairs with stools of about 75 cm. This also hides kitchen clutter from the living area, which many families appreciate in open-plan homes.
- Space behind the stools: leave at least 90 cm behind seated people if others need to walk past.
Storage inside the island
An island is prime storage because it is reachable from the centre of the kitchen. Used well, it can replace a whole run of wall cabinets. Used badly, it becomes a set of deep cupboards where things disappear.
We generally recommend drawers rather than doors for the working side of an island. Wide, full-extension drawers let you see everything from above: the top drawer for cutlery and utensils, the middle for pans and small appliances, and the deep bottom drawer for pots and bulky items. Doors with fixed shelves force you to kneel and reach into the back, and the corners of an island become dead space.
The seating side is often left as a flat panel, but in a large island it can hold shallow cabinets of 30 to 35 cm depth for serving dishes, trays, cookbooks or items that are used when hosting. The ends of the island can hold open shelves, a wine or water rack, or a narrow pull-out for oils and spices near the cooking zone. For the hardware that makes all this work smoothly, see our guide to hinges and drawer runners.
Services: the decisions that must come before tiling
An island in the middle of the floor has no wall to hide pipes and cables in. Everything must come up through the floor, and that means planning before the floor is finished. On many projects we are called in after the tiles are laid, and the choice of island becomes limited to what can be fed without breaking the floor.
Electricity
Even a simple preparation island needs power. Plan at least two double sockets, and more if you use several appliances at once. On a cooking island, the cooktop needs its own dedicated circuit sized for its rating. Sockets should be placed where they are protected from water splashes, and the electrician should use protected circuits appropriate for wet areas. If you plan lights inside the island, under the overhang or in drawers, the drivers and switches must also be planned.
Water and drainage
An island sink needs hot and cold supplies and a drain with enough fall to reach the main drainage line. The longer the distance, the more important it is to plan the route. If a dishwasher is included, it needs its own connection and drainage point. We always confirm these positions on site before the design is finalised.
Ventilation
If cooking happens on the island, extraction must be solved properly. A ceiling hood needs a duct route through the ceiling void to an outside wall or roof; a recirculating hood with filters is possible but less effective with the heavy, oily cooking common in many Saudi homes. We discuss this in depth in our kitchen ventilation guide, but the short rule is this: if you cannot duct the hood outside, think twice about cooking on the island.
Materials that behave well on an island
The island is the most visible part of the kitchen. It is seen from the living room, touched by everyone, and exposed on all four sides. That affects the choice of material in two ways: the finish must be consistent all around, and the carcass must suit the island’s function.
Carcass and structure
If the island contains a sink or a dishwasher, water will reach the carcass sooner or later. Aluminium kitchens are a strong choice here because the structure does not swell, rot or attract insects. For a dry, social island, a well-sealed carcass in other materials is perfectly fine. Whatever the material, the back and sides of the island must be finished panels, not the plain carcass sides that are normally hidden against a wall.
Fronts and panels
Because the island is a centrepiece, many clients choose a contrasting front for it: wood for warmth against light wall cabinets, deep-gloss acrylic for a modern statement, or tempered glass for a clean, reflective look that makes a room feel larger. Formica and acrylic with formica are sensible where budget matters, because the large panel area of an island can make premium fronts expensive. Saj offers a stable, water-resistant alternative with a painted finish.
Worktop
The island worktop is usually the longest single piece in the kitchen, so joints, thickness and support matter. Quartz and porcelain slabs are popular for their resistance to stains and heat; natural stone offers unique patterns but needs sealing and more care. If there is a seating overhang, the worktop must be supported by hidden brackets or a sufficiently rigid slab. We cover the differences in our dedicated worktop comparison.
Lighting over the island
Pendant lights over an island are almost a signature of modern kitchens, and they do more than decorate. They provide task lighting for preparation and a visual anchor for the room. As a guide, pendants usually hang about 75 to 85 cm above the worktop, and two or three fittings are typical for an island of 180 to 240 cm. Choose warm to neutral white light and fittings with good colour rendering so that food and materials look natural. The ceiling must be prepared with the right electrical points before the ceiling is closed, which is another decision to take early.
Island shapes and variations
Not every island is a simple rectangle. The shape should follow the room and the way the family moves through it.
- Rectangular island: the most efficient and the easiest to fit with drawers and a single worktop.
- Two-level island: a working level at about 90 cm and a raised bar at about 105 cm. It separates the messy prep area from the seating side.
- Island with table extension: the worktop continues into a lower dining table at around 75 cm height. It is ideal for families who eat in the kitchen every day.
- Waterfall island: the worktop material runs down the sides to the floor. It looks striking but increases material cost and requires precise cutting.
- L-shaped or angled island: useful in very large spaces, but it can interrupt circulation if not planned carefully.
Common mistakes we fix on site
After years of installations, the same problems appear again and again. Avoiding them is easier than correcting them.
- Squeezing an island into a narrow room. A walkway of 80 cm looks fine in a drawing and feels like a corridor in reality.
- Forgetting appliance doors. The refrigerator, oven and dishwasher doors must open fully without hitting the island.
- No power on the island. Clients discover they have nowhere to plug in a kettle or mixer and resort to extension cables.
- Too little overhang. Stools that cannot be pulled under the worktop become obstacles.
- Unfinished back panels. An island seen from the living room with plain carcass sides looks cheap, no matter how good the fronts are.
- Deciding the island after the floor is tiled. This limits the island to a dry, unserviced block or forces breaking the floor.
- Cooking on the island without proper extraction. Smells and grease spread through the open-plan living area.
How we design an island with you
Our process is the same whether the island is modest or large. First, we visit and measure the space free of charge, noting where water, drainage and power already exist and where they can be brought. Second, we discuss how the family actually uses the kitchen: who cooks, how often, whether guests are served from the kitchen, and whether children do homework there. Third, we prepare a 3D design that shows the island in its real position, with walkways, stool positions and open appliance doors, so you can see the space before a single panel is cut. Finally, we issue a written, itemised quotation so you can see what the island adds to the cost, and we manufacture and install the kitchen with our own teams under a written 10-year warranty.
If your kitchen is smaller than you hoped, do not give up on the idea of a central work surface. A peninsula, a mobile trolley, or a slimmer island with narrower storage can still give you the sense of openness you want. Our guide to small kitchen design explains how to make every centimetre work.
A quick checklist before you commit to an island
- Is the room at least about 3.8 to 4 metres wide between cabinet runs?
- Will there be at least 100 to 120 cm of clear walkway on all working sides?
- Have you decided the island’s main job: preparation, sink, cooking or seating?
- Have water, drainage and power routes been confirmed before tiling?
- If cooking on the island, can the hood be ducted to the outside?
- Do you have 60 cm of length per seat and about 30 cm of knee overhang?
- Will the back and sides be finished to the same standard as the fronts?
- Have you seen the island in a 3D design with appliance doors open?
If you can tick every point, an island will probably become the part of the kitchen your family uses most. If several points are uncertain, talk to us before you finalise the floor plan; a small change at the planning stage is far cheaper than a compromise after installation. You can also look at real projects in our virtual showroom or read how we calculate prices in our kitchen pricing guide.
Island ideas that work especially well in Saudi homes
Family life, hosting and cooking habits in Saudi homes shape islands in ways that generic design magazines rarely cover. Several ideas have proven themselves repeatedly in the homes we work in.
A serving island for guests. In homes that host often, the island becomes a buffet station where dishes are laid out before being carried to the majlis or dining room. For this role, a long, clear worktop matters more than seating, and a heat-resistant surface allows hot trays to be placed directly on it.
A separate clean island in a two-kitchen home. Many villas have a main kitchen for heavy cooking and a lighter, more presentable kitchen near the living area. The island belongs in the second one, where it can be finished in premium materials without the stress of daily heavy use.
A coffee and tea zone at the end of the island. Arabic coffee, tea and dates are part of daily hospitality. Placing a small appliance garage, a drawer for cups and a power point at the end of the island keeps this ritual close to the family area without cluttering the main worktop.
Deep drawers for large pots. Traditional dishes often need large pots and trays. Wide drawers of 90 to 120 cm in the island, with strong runners, make these easy to lift out without kneeling.
Budgeting an island realistically
Clients often compare an island to a single cabinet run and are surprised by the price. The difference comes from the finished panels on all sides, the larger and often thicker worktop, any overhang supports, and the services work. A sink or cooktop island also adds plumbing, electrical and ventilation work that sits outside the cabinetry itself. The best way to control the budget is to decide the island’s role first, choose materials where they are seen most, and ask for an itemised quotation that separates cabinets, worktop, hardware and services. That way you can adjust one line — for example, a simpler worktop edge or fewer drawers — without compromising the whole design.
An island is one of the few kitchen features that changes how a family lives, not just how the kitchen looks. Planned properly, it becomes the place where breakfast is eaten, homework is done and guests gather while the coffee is prepared. Planned in a hurry, it becomes something everyone walks around. The measurements in this guide are the difference.
Frequently asked questions
How much space do I need for a kitchen island?
As a working rule, the island itself should be at least 90 cm deep and 120 cm long to be genuinely useful, and you need a clear walkway of about 100 to 120 cm on every side where people move or doors open. In practice this means the kitchen should be roughly 3.8 to 4 metres wide before an island makes sense. Below that, a peninsula or a well-planned L-shape usually works better.
Can I put the sink or the cooktop on the island?
Yes, but each choice has consequences. A sink on the island needs a drain and water supply routed through the floor, so it must be decided before tiling. A cooktop on the island needs a ceiling-mounted or downdraft hood and a dedicated power line. Many Saudi families prefer to keep heavy cooking against the wall and use the island for preparation, serving and seating.
What is the right height for island seating?
A standard worktop height of about 90 cm suits counter stools with a seat height of roughly 65 cm. If you want bar-height seating, the raised section is usually around 105 cm with stools of about 75 cm. Allow at least 60 cm of worktop length per person and about 30 cm of overhang so knees are not pressed against the cabinet.
Which material is best for a kitchen island in Riyadh?
It depends on what the island does. An island with a sink benefits from water-resistant carcasses such as aluminium, while a purely social island can show off wood or high-gloss acrylic fronts. Because the island is visible from every angle, the back and side panels must be finished to the same standard as the fronts.
Does an island increase the price of the kitchen?
Usually yes, because it adds finished panels on all sides, a larger worktop, and often extra plumbing, electrical and ventilation work. The increase depends on size, material and services. A written, itemised quotation lets you see exactly what the island adds rather than a single lump sum.
Can Modern Palace design an island for my existing kitchen?
Yes. We measure your space for free, check where water, drainage and power can be routed, and show you the island in a 3D design before anything is manufactured. We serve Riyadh, Al-Ahsa, Buraidah and Hail.
Planning a kitchen with an island?
Send us your kitchen dimensions and we will arrange a free measuring visit, check water and power routes, and show you the island in a 3D design before manufacturing. Riyadh, Al-Ahsa, Buraidah and Hail.